A workbench is easy to overlook in photographs of finished furniture. It is there behind almost every cut, mark, clamp, and second thought, but it rarely gets to be the subject. These photographs from October 2020 give it the whole frame. They show a broad work surface in a garage shop, an open lower shelf, places to hang drills, a drawer and side storage, and a simple wooden holder for a clamp. The bench looks used rather than staged. Tools are on top, cords are visible, and the floor has the marks of a working space. That is precisely why I want to keep this story.
When I look at a workshop, I think less about how many tools are in it than about whether the space helps a person work. Is there a level place to lay out a board? Can a measuring tape be found without clearing the whole table? Is there somewhere to put a drill when the next step requires both hands? Will a clamp be within reach when a part needs to stay still? A bench cannot answer every one of those questions, but it can make the answers easier. This one shows the ordinary value of giving tools and materials a home near the work.
The photographs do not provide a measured plan or a complete construction record. I cannot tell you the exact lumber sizes, fasteners, load rating, or sequence of cuts from these views. What they do show clearly is the design logic: a large top supported by a substantial frame, open storage below, and small additions where a hand naturally reaches. That is enough to talk about how a workbench can grow around the work it needs to support.
A broad surface changes the way a shop feels
The first photograph is mostly surface. The top occupies much of the frame, with a saw, tape measure, and other tools resting on it. There is room around them. That open area matters because woodworking asks for more than a single tool at a time. A board may need to be measured, marked, clamped, cut, checked, and adjusted before it is ready to become part of a piece. If the work surface is too crowded, every step begins by moving something else out of the way.
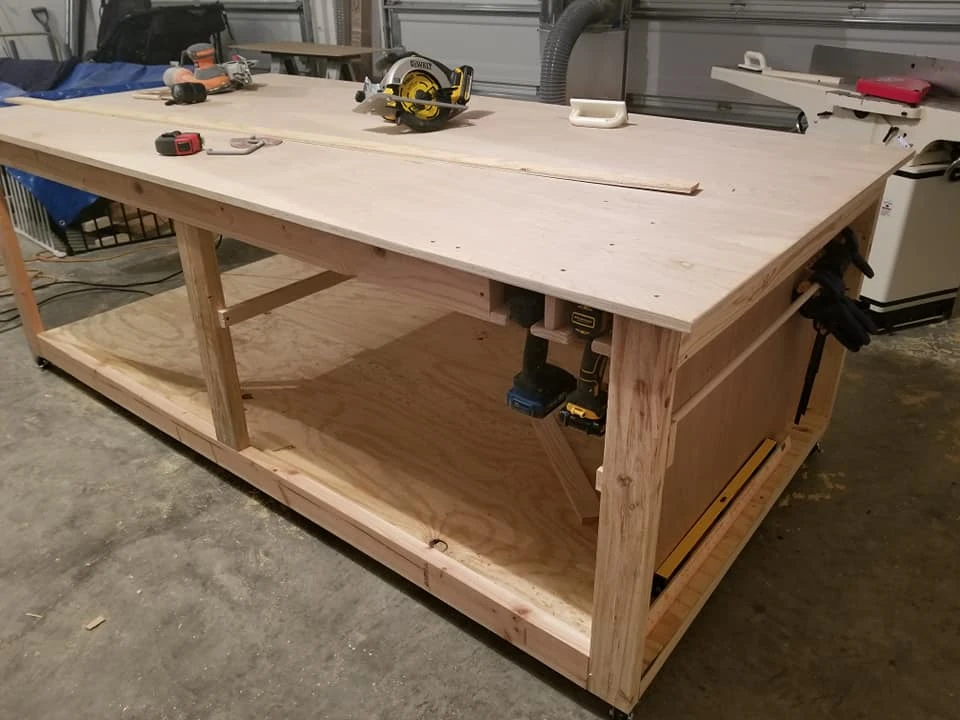
The top appears to be a sheet surface with a defined edge. In a busy shop, a broad sheet can give a convenient, continuous place for layout and assembly. It can also act as a temporary home for the tools needed in the current stage. That does not make it indestructible. I would still use appropriate support when cutting, drilling through, or doing anything that could damage the top or create a hazard. A sacrificial board, a clear cut path, and the tool manufacturer's guidance matter more than the fact that a bench looks sturdy in a photograph.
Under the top, the frame has enough visual weight to make the surface feel grounded. The legs and long rails define a large open bay. The lower shelf adds a second horizontal plane without closing the bench in. From the wide view, you can see through parts of the structure and understand where larger items might go. This is a useful kind of storage because it does not require every object to fit a small compartment. A box, an offcut, or a larger tool can be set down while the top remains clear.
The open design also makes it easier to notice what has accumulated. Closed storage can be wonderful for dust control and a calmer room, but in a working shop I appreciate being able to glance under a bench and see what is actually there. Open shelves invite a little discipline: heavy items should have stable support, loose small pieces should be contained, and the floor beneath should remain reachable. The photograph is a snapshot of real work, not an instruction to keep every object visible forever.
The space beneath the top is working space too
The most useful storage is often just below where the work happens. When a bench has a lower shelf, it can hold supplies without taking them out of the room or putting them on the main surface. The photographs show that lower area as part of the bench's structure, not a separate cabinet pushed underneath later. That integration makes the large footprint of the bench earn its place. The same floor area supports work above and storage below.
There is a tradeoff to consider in any version of this design. A very low shelf can be awkward to reach, while a high shelf may take away legroom or space for larger tools. The right position depends on how the bench is used. If I expected to sit at it, I would check knee clearance. If I expected to stand and move around all sides, I would think about what my feet might catch. If a heavy machine belonged below, I would consider how to lift it safely and whether the shelf and frame were designed for that load. The photo cannot supply those answers, but it prompts the right questions.
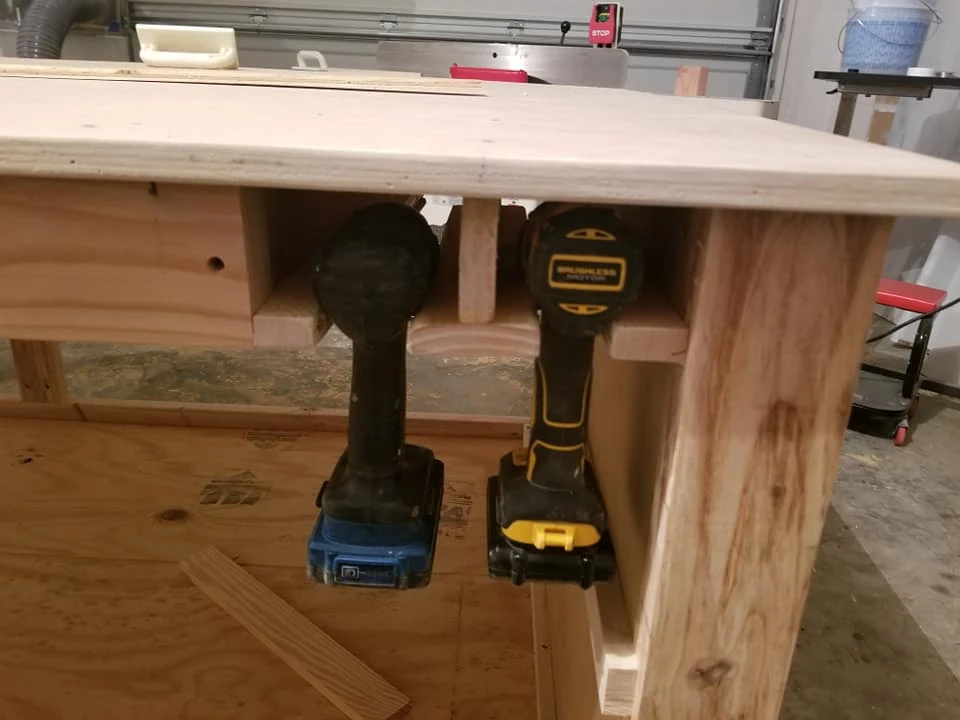
The broad top also creates a natural place for accessories along the apron. The second image brings two drills into focus, hanging beneath the edge in individual wooden bays. From a distance, those holders may be a small detail. Up close, they explain a lot about the bench. The drills are off the work surface, visible, and easy to distinguish. Their handles hang down in a predictable place, and the top is free for the board or assembly in front of the maker.
A place for the tools used most often
I reach for a drill often enough that setting it down between tasks can become its own little problem. On a crowded bench, it can roll toward an edge or end up under a board. A dedicated holder near the front apron gives it a repeatable landing place. The pictured bays are simple wooden supports, with enough separation for two different tools. That separation matters when one is set up to drill and another to drive a screw. The right tool can be picked up without changing bits each time.
These holders are a good example of designing from an actual habit. They do not need to be an elaborate wall system. They live at the point of use. A person standing at the bench can put a drill away for a moment and then reach for it again without turning around. That small reduction in friction makes a workspace feel calmer. It also creates a visual reminder to clear the top when the task changes.
I would still plan the holders around the real tools, not around a photograph. Cordless drills have different grips, batteries, balance points, and dimensions. A slot that supports one model may squeeze another or let it fall. I would check that the tool cannot slip out unexpectedly, that the battery has adequate clearance, and that nothing sharp or moving is close to where a hand reaches. I would also keep a charging routine separate from storage unless the electrical setup was designed for it. The photograph shows a useful idea, not a universal template.
The two drills also tell a little story about workflow. One has a blue battery, the other a yellow-and-black base. They do not have to match to belong in the same shop. A workbench is not a catalog display. It is a place where the tools a person actually owns should fit, regardless of brand or color. The holders make that mixed collection feel organized through placement rather than through appearance.
A bench can change as the work changes
In another view, the bench is fuller. Tools, supplies, and a container of fasteners are on the top. A drawer is open at one end. Under the surface, the storage has become more specific: bins and shelves share the space, and long tools or guides are kept along the side. This is the kind of photograph I find especially useful. It shows a bench in use, after the first clean view, when practical needs have made themselves known.
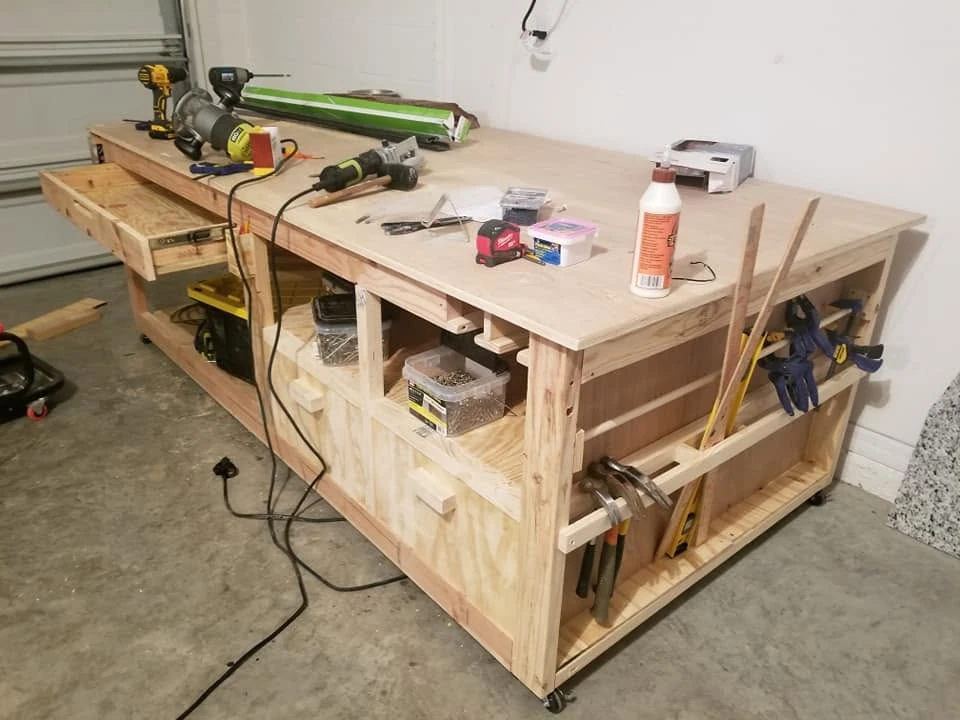
A drawer changes the way small items live in a workshop. Screws, pencil leads, bits, and other loose pieces are easy to lose on a broad surface. A drawer can hold them near the work without exposing everything to dust and movement. The photograph does not reveal its internal organization, but the open drawer makes the principle clear: not every tool belongs on a shelf, and not every useful thing needs to stay visible. The best storage mix follows the shapes and frequency of use.
The bins beneath the top do a different job. They keep collections of small supplies together while allowing the maker to see what is inside. A transparent container may not be beautiful, but it can prevent buying the same fastener again because the first box has disappeared. I would label bins only as much as I needed to make them easy to return to their place. An elaborate organization system can become another project; a clear container at the right height is often enough.
The side storage is interesting because it uses a face of the bench that might otherwise be empty. Long narrow items are awkward in a deep drawer and can get lost beneath a pile of material. A side rack or opening gives them a separate place. I would think about which side of a bench remains accessible once it is positioned in the shop. A clever holder on the wall-facing side is no help at all. The photograph shows the bench standing where those side accessories can be reached.
There are cords and tools across the working view, too. I do not want to edit them out of the story. They remind me that a functional workshop is a moving situation. Before using a saw or another power tool, I clear the path, keep cords out of the cut, and make sure the workpiece is supported. The goal of good storage is not a permanently empty photograph; it is a safe, workable arrangement that can be reset for the next operation.
The small clamp holder has a clear purpose
The last image is a close look at a clamp hanging from a wooden holder along the bench. It is a modest detail, but it may be the most revealing one. A clamp is useful exactly when a part needs to stay put, and at that moment I want it close. The holder gives the clamp a place off the top, where it can be seen and lifted without searching through a pile. Its shape is simple enough to understand at a glance.
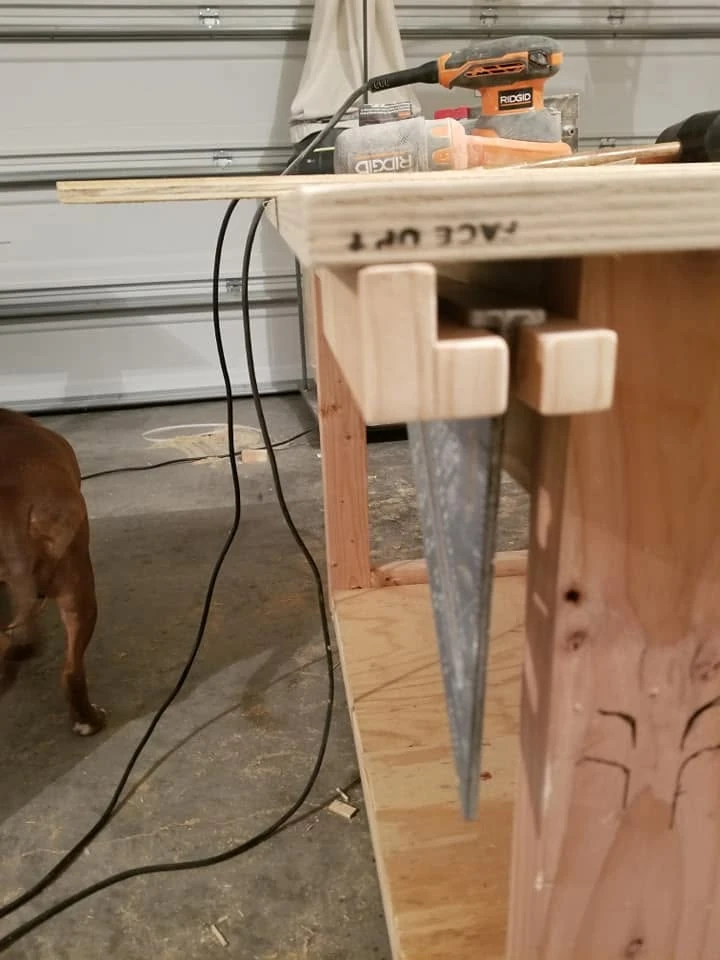
The close view also shows the edge of the top, the post below, and a tool resting above. It is a good reminder that accessories must fit the main structure. A holder should not weaken a critical joint or obstruct a rail. It should allow the clamp to hang securely without creating a sharp or awkward projection in a walking path. The exact spacing depends on the clamps and the bench, but the general idea is useful: put a common tool near the part of the work where it is needed.
Not every clamp would belong in this particular holder. Long bar clamps, spring clamps, and small quick grips ask for different storage. A workshop can make room for each type in a way that suits its size and weight. The photograph documents one local solution rather than a system for every clamp. That is part of its charm. Practical additions often come from noticing a repeated annoyance and building a small answer.
There is a lesson in the unfinished look of the holder as well. It does not need paint, a label, or decorative trim to be successful. In a workshop, a small part can be valued for being sturdy, clear, and easy to reach. Some handmade details are meant to be admired from a room away; others quietly save a few seconds every time they are used. Both are worth making.
Layout before accessories
If I were planning a bench inspired by these photos, I would begin with the work that needs to happen on top. Would it hold large boards for layout? Would I assemble furniture there? Would I need to move around it, or would it live against a wall? Those choices determine how much clear surface and access are needed. Only after that would I decide where drills, clamps, drawers, and bins should go. Storage should support the work surface, not consume every edge of it.
I would measure the room as carefully as the bench. A large top is wonderful until it blocks the path to a door or leaves no space to feed a board past a saw. It is worth marking the intended footprint on the floor and walking around it. Consider the garage door, outlets, dust collection, and any tools that need space on both sides. The photos show a generous bench in a garage setting, but the right footprint for another shop could be very different.
Height deserves its own test. A bench that feels comfortable for one task may feel too low for close layout or too high for a tool that already sits above the surface. I would try a temporary surface at different heights before deciding. The top is where the body meets the work, and a small change there can matter every day. The images cannot reveal the maker's height or preferred working position, so copying a dimension from them would be guesswork.
The frame and shelf must suit the loads they will carry. A broad surface can invite heavy assemblies and power tools, while lower storage adds its own weight. I would choose a sound plan or design, check the joints and bracing, and confirm that the top is supported for the intended tasks. If mobility is part of the plan, wheels and locks need ratings and placement that match the loaded bench. A photograph may show that a bench is useful; it cannot certify its capacity or stability.
Making room to change your mind
One reason I like this workbench is that it does not look frozen at the moment it was first built. The open frame leaves room for different storage. The apron can accept a practical holder. The side can take a rack. The drawer and bins answer different kinds of clutter. It is easy to imagine that the arrangement could be adjusted again when another tool or project changes the routine. That flexibility is a valuable feature in a workshop.
I would resist filling every available inch with compartments on the first day. Leave some open space and use the bench for a while. Notice where tools naturally land and which items are always being moved out of the way. A holder added after that observation is likely to be more useful than one copied from a photograph because it responds to the way the shop actually works. A bench is a piece of furniture for making other pieces; it can evolve as the maker does.
The same principle applies to how the top is treated. It may acquire marks, but a flat, dependable working area is more useful than a surface preserved so carefully that no one wants to use it. Protective scrap, cleanup, and periodic maintenance can keep the top serviceable. I would not confuse a clean photograph with a good working habit. The value of the bench is in the projects it makes easier to begin and finish.
What these October photographs keep for me
The wide image records scale and openness. The drill close-up records a repeatable place for often-used tools. The working view records how storage and daily activity meet. The clamp detail records a small, specific solution. Together they tell a fuller story than a single polished workshop picture. They show a space being used to solve practical problems, one useful surface and one reachable tool at a time.
There is also a sense of continuity between this bench and the furniture that comes out of a shop. The same questions appear in both places: Where will the hand go? What needs support? What should be easy to find? How will the piece work after the photograph is taken? A workbench makes those questions visible because it is used so directly. Its design is tested every time a board is marked or a tool is set down.
I share these images as a workshop story, not as a measured build guide. If you want to build a bench, choose dimensions and joinery for your space, loads, and tools, and follow the safety guidance for the equipment you use. If you are simply looking for a way to make your current shop easier to work in, start smaller. Give one tool a dependable home. Clear one part of the surface. Put a clamp where it can be reached without interrupting the task. Those changes may be modest, but they make the next project easier to start.
That is what I see in this bench from October 2020: a place made for the work, with enough room to keep changing along with it. The tools on top and the storage below are not separate stories. They are parts of the same everyday rhythm. A good workshop does not need to be perfect to be useful. It needs a solid place to begin, and a way to put things back when the work is done.
Joy